Ultimate Guide to Performing Phlebotomy: Step-by-Step Techniques for Medical professionals
Phlebotomy is a crucial skill for healthcare providers, enabling the collection of blood samples for diagnostic testing, transfusions, and research. Performing phlebotomy safely and efficiently requires proper technique, understanding of anatomy, and adherence to safety protocols. Whether your a new medical professional or seeking to refine your skills, this thorough guide will walk you through each step of performing phlebotomy confidently and competently.
Introduction
In the realm of medical procedures, phlebotomy stands out as a routine yet vital task. Mastering the art of drawing blood not only improves sample quality but also minimizes patient discomfort and the risk of complications. This ultimate guide aims to provide step-by-step techniques, practical tips, and best practices to help healthcare professionals perform phlebotomy with precision and safety.By understanding the nuances of vascular anatomy, proper equipment handling, and patient dialog, you can enhance your skills and deliver extraordinary patient care.
Benefits of Proper Phlebotomy Techniques and Practical Tips
- Accurate Diagnostic Results: Proper blood collection minimizes pre-analytical errors.
- patient Comfort: Gentle techniques reduce discomfort and anxiety.
- Enhanced Safety: Following safety protocols prevents infections and needlestick injuries.
- Operational Efficiency: Mastery ensures quick,successful blood draws,especially in high-volume settings.
practical Tips for Successful Phlebotomy
- Always verify patient identity before procedure.
- Use correct equipment-appropriate needles, tubes, and tourniquets.
- Choose the right site based on venous anatomy and patient condition.
- Apply tourniquet snugly but not too tight, usually for no more than 1 minute.
- Enter the vein at a 15-30 degree angle, adjusting as needed.
- Insert the needle smoothly and advance gently to avoid vein collapse.
- anchor the vein with your thumb to stabilize it during needle insertion.
- Follow proper order of draw to prevent cross-contamination of additives.
- Promptly release tourniquet after blood flow is established.
- Apply pressure with gauze immediately after needle withdrawal.
The Step-by-Step technique of Performing Phlebotomy
1. Preparing for the Blood Draw
Preparation is key to a successful phlebotomy. Gather all necessary equipment and verify patient details.
- gather supplies: tourniquet, alcohol swabs, needles, vacutainer tubes, gloves, gauze, adhesive bandages.
- Identify the patient and confirm the order for blood tests.
- Wash hands and put on gloves to maintain infection control.
2. Selecting and Preparing the Site
Choosing the optimal site enhances blood flow and reduces patient discomfort.
- Typically, the median cubital vein in the antecubital fossa is preferred.
- If unavailable, options include cephalic or basilic veins.
- Palpate for a prominent, pulsatile, and soft vein.
- Disinfect the site with an alcohol swab using a circular motion outward from the site.
- Allow the area to dry completely to prevent alcohol mixing with blood.
3. Applying the Tourniquet
The tourniquet helps engorge the vein for easier access.
- Apply approximately 3-4 inches above the selected site.
- Snug enough to engorge the vein but not so tight as to cause pain or nerve compression.
- Limit to one minute to prevent hemoconcentration, unless necessary.
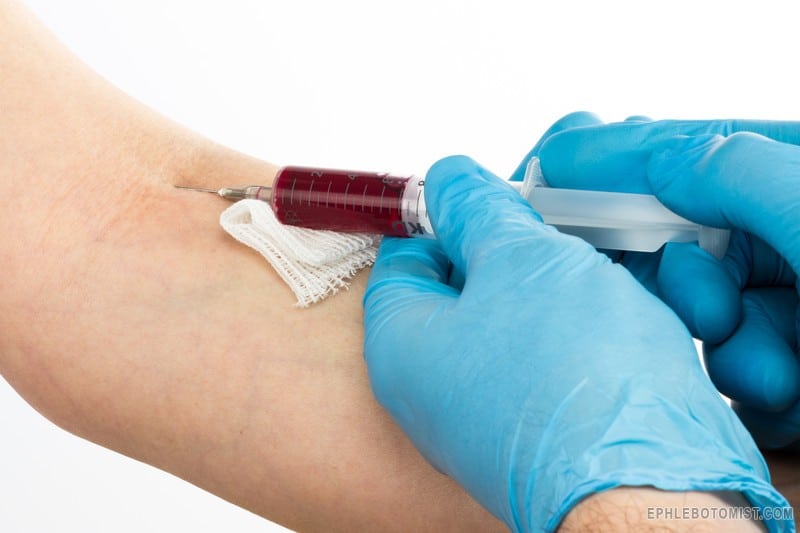
4. Inserting the Needle
Precision during needle insertion is vital for patient comfort and specimen integrity.
- Hold the patient’s arm steady, support the vein with your non-dominant hand.
- Hold the needle with your dominant hand, aligning it at a 15-30 degree angle relative to the skin surface.
- Insert the needle smoothly, with the bevel facing upward, into the vein.
5. collecting the Blood Sample
Once the needle is in, attach the collection tube or vacutainer holder.
- Allow blood to flow naturally into the tube; if using evacuated tubes, blood will draw automatically.
- fill tubes according to the order of draw to prevent cross-contamination.
- Monitor for any signs of vein collapse or patient discomfort.
6. Withdrawing the Needle and Post-Collection Care
Proper removal minimizes trauma and bleeding.
- release the tourniquet before withdrawing the needle to prevent vein collapse.
- Gently withdraw the needle at the same angle as insertion.
- Immediately apply gauze over the puncture site with gentle pressure.
- Ask the patient to hold the gauze until bleeding stops.
- Secure the bandage with adhesive tape if needed.
7. labeling and Handling the Blood Samples
accurate labeling ensures result validity.
- Label tubes with patient ID, date, and time of collection.
- Handle samples carefully to avoid hemolysis or contamination.
- Transport samples to the laboratory promptly, following institutional protocols.
Common Mistakes and Troubleshooting Tips
| Issue | Possible Cause | Solution |
|---|---|---|
| Needle missed vein | Incorrect site, poor palpation | Reassess site, choose another vein, ensure palpation is proper |
| Vein collapses during draw | Too large needle, excessive vacuum | Use smaller gauge needle, check tube fill level |
| Patient experiences pain | Incorrect insertion angle, rough technique | Adjust angle, support the vein, be gentle |
Real-Life Case Studies: Lessons from Practice
Case Study 1: Difficult Venous Access
A 55-year-old patient with dehydrated veins presented difficulty during blood draw.The solution involved warming the extremity to promote vasodilation and using a vein finder device. After gentle palpation and proper site selection, successful blood collection was achieved without patient discomfort.
Case Study 2: Needlestick Injury Prevention
During a busy clinic, a phlebotomist accidentally pricked themselves. The incident highlighted the importance of using safety-engineered needles and proper disposal protocols. Continuous training and adherence to safety measures significantly reduced occupational injuries.
First-Hand Experience: Tips From Practicing Medical Professionals
Many experienced phlebotomists emphasize the importance of patient communication. Explaining each step reassures patients and reduces anxiety. Moreover, practicing patience and maintaining a calm demeanor can make even challenging draws smooth and safe.
Conclusion
Performing phlebotomy with confidence and accuracy is an essential skill for all healthcare professionals. from site selection and equipment handling to patient communication and safety practices, each step contributes to successful blood collection and optimal patient outcomes. By mastering the techniques outlined in this comprehensive guide, you can ensure safe, efficient, and minimally uncomfortable procedures. Continual practice, attention to detail, and adherence to established protocols are the keys to becoming a proficient phlebotomist. Remember, every successful blood draw not only aids in diagnosis but also builds trust and confidence with your patients.